Rummaging through my refrigerator this morning trying to find something interesting to go with my bread my eyes fell on the crayon cheese I made back in early May. It had been sitting in the back of the fridge and out of site ever since, the idea being that good cheese needs to age, a month at a minimum. Actually, make that two months and beyond, one month was merely the estimate how long it would take for the cheese to be any good at all.
Well, there it was, pink as on its first day, and definitely at least a month old. Of course I was curious how it had turned out beneath that pink paraffin shell. And not only that, I have actually designs on making another one. But only if this experiment was any good at all. Making cheese had proven time consuming after all, and before doing it again I would want some reassurance it would not be an effort wasted. So I decided it was time to put that cheese to the test.
Just cutting that cheese left me under the impression the cheese was very dry and not creamy at all. No big surprise here considering that I had made that cheese from half fat milk. Normal cheese is not only made from full fat milk, it often also has extra cream added. Also, the interior of the cheese was still as white as on the day that I had waxed it, not yellowish as I would have expected it. Most other hard cheeses are yellow mine was not. Why not? I do not know.
The next step after cutting a wedge off of my cheese was to peal the wax from it. I quickly noticed that using colored paraffin for cheese wax was less than an optimal solution. It is a solution as it did keep my cheese from spoiling. No nasties were growing on it and that was good. It did not smell rooten or spoiled and that was even better. But the paraffin shell was difficult to peel off. The main problem with it was that it was very brittle, breaking easily into tiny pieces as I tried to pull it off. It took quite a while to get most of the paraffin off the cheese, and many of the tiny pieces never came off at all and wound up as part of my meal instead.
And then, the cheese itself. It does have a little aroma but definitely not very much. Similar for the taste: It has taste but it is not strong at all. A little bit like a very mild cheddar. It goes well with my bread but then, any commercial cheese goes well with bred, too. So while my cheese is not bad I would definitely prefer it to be more assertive: With a stringer aroma, and definitely with a stronger taste.
I am hoping that both aroma and taste are a function of aging. Meaning that given more time ripening in the back of the fridge there will be more aroma and more taste. As to why my cheese remained white instead of turning more toward yellow I don't know. Neither do I care much: If I can get the aroma and the flavor right I won't care much what the color is, and after all, white is still a lot better than a lot of other colors I can think of. So I will assume the missing piece is extra aging. And I am even going to put it to a test, by making another, and then waiting longer before I eat it.
But before trying again I need some real cheese wax. While that crayon in the paraffin that I used was non toxic I still did not like it too much in my cheese. Finding real cheese wax may turn out to be somewhat of a challenge but it will definitely be worth it. At least that much I am sure about.
Wednesday, June 19, 2013
Tuesday, June 11, 2013
Out of the comfort zone
It's not good if everything is well.
For the last six wees or so I have been perfecting my art in brewing, bread baking, and basic cheese making. And while I am still far from perfect in any of those the result have become passable, well, actually quite good. I would no longer consider buying any bread from the supermarket. My beer is the best to be had for less than seven bucks the six pack (by my totally unbiased opinion at least), and between buttermilk, yogurt, and quark there is little need to buy anything from the store - apart from flour and milk, that is.
Apart from being tastier and cheaper making my own food also proves to be a lot of fun, even now that the big experiments are over, and I pretty much know what will work and what won't. It is so much fun actually, I continue to do a lot of it all: brew a lot of beer, bake a lot of bread, make a lot of milk stuff. And this is where suddenly the problems arise:
While I do spread around some of my bounty occasionally, most of the stuff gets consumed right here - and by me. As a result I have been gaining weight, to the tune of six pounds over the last six weeks! That's right, during the time of the year when the last of the winter pounds usually come off, I managed to gain. During the time of the year when I am usually at my leanest I am now at my heaviest. NO GOOD!
And no, it is not only on the scale. While I usually run a lot I have not felt much like running lately. This usually is a sure indicator of extra pounds making the running less comfortable. When I do run then the former energy just isn't there; I run both shorter and slower than I used to. It is obvious: A the good food is making me fat and lazy. Again, NO GOOD!
I finally decided to do something and to fight back. No, not by eating less or (gulp!) drinking less, but by running more. And just how would I suddenly get motivated if I was not before? Well, by joining a group of other runners, of course. So from now on, I will be running in addition to baking and brewing, at the least every Tuesday and Saturday, and quite possibly more often. In addition, I should have an easy time offloading some of my stuff on these folks, leaving less around for me to eat.
Sounds like a three way win situation for me: I run more, eat less, and the other runners will get something out of it too! So let's see how that is going to turn out ---
Tuesday, June 4, 2013
Prohibition Ale (I)
Almost from the beginning of my brewing endeavors I have been wondering what people did during the prohibition years in the first part of the last century. After all, it is well known that a lot of illicit at home alcohol production did take place. At the same time, if prohibition was to come upon us ever again I would expect the home brew supply stores to get swept away along with the breweries. So then, what did people do, or even more interestingly, what could they do now to get their fix?
For starters, beer needs malt, hops, yeast, and water. Water will always be available, there is just no way to outlaw that. Yeast? You can get yeast from all sorts of places. Even better, you should be able to keep it. Meaning you keep some of the sludge that collects at the bottom of the carboy as the wort clears and you should be ready to go. Hops? No idea. Allegedly, it is growing wild near old rail tracks, seeded by hops blown off from delivery train in times past. I have to check on that. Some day.
The biggest obstacle seems to get hold of malt. And no, germinating, drying, and roasting you own barley seed is not an option, at least not for the ones of us that don't have their own farm. No it has to be something more inconspicuous, something that's already available as something else. Plain sugar? Would work as far as the alcohol is concerned but the final product certainly would not be beer. Rather, it would be the stuff moonshine is made from, hardly drinkable without distillation.
So - what then? Maybe - bread? It's mostly wheat hence similar enough to barley, it least on the outside. And maybe I could cook the bread first, to possibly mirror some of the effects of roasting, and at the same time release the starches and sugars out of the bread much like the cooking of roasted barley does? At the least, it did not sound totally outlandish. Was it actually feasible, and would it produce something even remotely recognizable as beer? Well, there is one sure way to find out ---
So from my last trip to the grocery store I returned with the following items: Three loaves of the cheapest bread I could find. I sure was not sacrificing my own bread for that type of experiment. And after all, even though that cheap store stuff is barely edible it may just prove useful for something at last. In addition: Four pounds of table sugar. I wasn't going to use it all but surely it would be OK to supplement my brew a little bit, or actually a little more because during times of prohibition, you can't put the standards too high.
Back home I first roasted the bread some in the oven, then threw it all into my brew pot, added two gallons of water, 1 1/2 pounds of sugar, then brought the mixture to a boil. That's when I remembered I needed some to simulate hops for bitterness, and after some quick hesitation went outside and cut some twigs from the next juniper tree. Juniper berries have bitterness to them and so do young pine needles. Just to make sure I ripped off and chewed a little piece: It was bitter alright and so for now, I had my hops.
I brought my mixture to a boil and when I returned to my kettle some twenty minutes later I discovered the first problem with my theory: The bread has acted much like oatmeal- so instead the water absorbing the goodness out of the bread the bread had absorbed all the water and left me with something reminiscent of a giant bucket of wallpaper glue. No good! I spent the next 1 1/2 hours to squeeze and rinse as much liquid out of that slime as I could to salvage my operation, and another 1/2 hour after that the clean my kitchen that I had totally messed up in the process. Regardless if how things would go from here, I already had figured it was not the way to go.
Having put in that much effort already I decided to press on, learn at least from what remained to be learned from that experiment. From all the squeezing and rinsing I had gotten some two gallons of thick, sweet,milky liquid which I duly transferred into my carboy. I added another gallon of fresh water to make it a total of three gallons, which was the amount I had decided beforehand to commit myself to. For yeast? Well, I had anticipated this experiment and kept the sludge from my last batch of real beer. I used about a cup of that.
The concoction started to get alive after about four hours and has been active for the last almost two days. Normal beer produces a regular bubbling, about one "blrrp" in regular intervals every ten seconds when most active, or every minute when fermentation is almost done. This mixture makes "blrrrrrrrrrrrrrrrrrp", almost blowing the water out of my air lock. Sometimes it will hesitiate, or just make a "blrrp", only to follow this up with yet another "blrrrrrrrrrrrrrrrrrp". Very strange.
The "wort" itself is also somewhat "unusual". It never lost its milkiness so the liquid appears a yellowish white. There is noticeable sludge buildup at the bottom of the carboy, at this point probably more from settling bread particles than from spent yeast. There is foam floating on top, white mostly but also with some green to it- I figure that would be the juniper.
Definitely fascinating, almost like with a mind of its own. Kind of scary looking, too. And of course, I am just watching right now, waiting for fermentation to come to a conclusion. After that? Second fermentation? Bottling? I think I would at least want to sample some of it before committing myself to any extra work. Or better still, find someone else to sample it for me just in case it makes people go blind. Thinking of it, I believe I know just the perfect candidate for that ---
Wednesday, May 29, 2013
Quick takes
So much to do, so little time left to write. Therefore, just a quick summary of the latest happenings in the chaos kitchen:
- I dried some sourdough by spreading it with a knife on a plastic bag and then let it sit for a day. Then I collected the dried up pieces into a small Ziploc container and put them into the freezer. The idea is to defrost them in a month time and test whether the reconstituted sourdough will be any good.
- My latest batch of new bread consisted of two loaves each of 25% rye and 25% whole wheat bread. The whole wheat dough was of great consistency and easy to work with. The rye dough was rather wet and impossible to knead: It just gummed up my fingers. Surprisingly, all loaves came out rather good, even the rye bread that I could I could not knead and that I finally just left to mold itself into the bread pans.
- I tried myself at another rennet cheese. I am wondering whether I am setting the curds at a high enough temperature because mine are not as firm as they look in pictures. Will try setting at a higher temperature next time.
- My cheese press was a disaster this time, leaking cheese big time and forcing me to repack the curds repeatedly. Maybe it's because the curds were too soft. Even if they were I believe my design could bear some improvement. Still thinking about exactly how.
- Did another batch of yogurt, with full fat milk but without milk powder. The result was rather soft and I had made sure the incubation temperature was as high as possible. It might still be worth it to live with softer yogurt in the future it that means I can cut out milk powder as a necessary ingredient.
- Tried the first two bottles of my second batch of beer. Not sure what to think because it is rather different from the first batch. It's not bad I think (it still officially needs a few days of aging) but I would like to know what accounts for the marked difference of the two batches when the recipes were almost the same.
Sunday, May 26, 2013
News from the bathtub brewery
One effect of having basic brewing equipment around the house is that seemingly I can no longer tolerate the sight of unoccupied carboys. And since there is never a problem ever to give away surplus beer I decided it was time for yet another batch of Hobo's Delight([1], [2], [3]). Just the basic recipe this time and no experiments; I just wanted to settle into a routine to build on before setting out for new adventure.
Boy was I wrong about that routine part! Because in me, familiarity does cause complacency, and in this case, near disaster as well. My mixture of water, malt and sugar was slowly heating up, slow as always to get to the boiling point. A minimum of ten minutes to go I figured and so I went for a quick two minute trip to fetch something from my car out in the parking lot. OK, it might have been a little more than two minutes that I was gone but what I did not expect was to return to an eruption of boiling wort out of my brew kettle, creating a mega mess not only on the stove top but on the sides and the floor before as well.
So what to do first? Turn off that stove, of course, then grab that kettle and set it into the sink. Next? Silence that stupid smoke detector that suddenly also had caught on the the fact that something was not quite right. Yes, and then open all windows as wide as possible. And with the most immediate crisis taken care I finally had the time to stop for a minute and actually plan my next moves.
Of course I was not to abandon my wort. That's $25 which I was just going to dump down the drain. On the other hand, there was no way I could just continue my cooking like this. With all the spilled wort everywhere that smoke alarm would have triggered again almost immediately. Not to speak of the fact that it was not a good idea to pretty much bake permanent stains into everything the spilled wort had gotten onto and into. Obviously, I had to cool down the burner quickly and clean up first.
It was a major operation. Burned wort is second only to burned milk in the damage it does. And it is second only on account of not smelling quite that bad, in terms of the mess it is right up there. For beginners, when sugars get too got, like when they get on the heating stove burner, will disintegrate into layers and bubble of carbon and lots of smoke. The carbon will create a tough layer of crust on everything it gets on, the smoke will only set of smoke detectors. Any wort that had not turned into a bubbly sheet of carbon still had most of the water evaporated out of it and become something resembling sticky glue.
It is amazing how many parts stoves suddenly have when they are given the opportunity to get gummed up wort all over them. There is the heating coil of the burner of course, and there is the pan underneath. There is the stove top itself, which can also be flipped up to reveal some of the innards of the stove. Luckily the mess did not extend any farther than that. But there still was the door to the oven, a little that had somehow made it into the oven, and the floor in front of the oven. And all heavy scrubbing; this was not stuff you simply wipe off. I got it all clean in the end except for the burner pan. I might try some sand paper on it some day but I am afraid it has been discolored permanently.
The brew kettle needed some major help as well. There was no black layer on it but it needed special handling because I did not want any of my cleaners in the wort. Besides, that kettle was still hot. But compared to the surgery I had done on the stove it was easy. While I was working on that stove for over half an hour the kettle got clean in something like ten minutes. And after reassembling my stove I was finally ready to resume boiling my wort.
Would I add any extra malt or sugar to make up for the loss? I decided against it. Just as with milk, a little boiled over wort has the potential for big damage. Hence I was hoping that even though the mess had been big the actual loss may have been minor. Besides, I would have only been guessing at how much replacement was needed anyway. Better to make an assessment from the finished beer and have a better idea if it ever happens again. OK then, keep boiling, go on like nothing ever happened.
It goes without saying that I stood right next to my kettle up the point I reached the boiling point once again. I am also glad to report there were no strange odors through out the remaining cooking process, so I must have done a pretty decent job cleaning up and removing the spill that had not yet turned to carbon. The entire remaining cooking went through entirely unremarkable, and I was rather grateful for that.
All this happened yesterday. As I transferred the wort into the carboy it became clear that indeed I had not lost too much of it, probably no more than a pint. As long as I did not introduce any contaminants into the wort during the cleanup the beer will be fine. It started fermenting within the usual six hours after pitching the yeast and that's a good sign. I will get a better picture next week when this beer is hopefully ready for its bottling.
My pink cheese
It has been two weeks since I started making an attempt at my very own red waxed dream cheese. Since then, the pressed cheese had basically been sitting in my fridge and growing the rind that my Internet sources had instructed me to wait for. And for the last few days, I have positively been antsy about my cheese.

Part of the reason for my antsiness was that I was not sure how much longer to wait for the next step. Some areas had indeed developed a yellowish layer of dry crust which I supposed was the rind. Other areas, however, were still white and were not showing any desire to ever be anything but white. To complicate matters my cheese started to crack at the edges, in exactly the spots that had developed the thickest of the crust.
The short of it I decided it was time to move on to the next stage which meant --- waxing my cheese. Which obviously brought up one question that I had not given too much though before: Now what do I wax it with? Sure, there are plenty of places on the Internet that will gladly sell you cheese wax but I did not see myself sinking like $20 (once shipping and handling is figured in) to wax a single cheese, then possibly decide I have had enough of that and sit on a pile of unused cheese wax for the rest of my life.
The local Walmart offered paraffin for canning and other household uses, and candles. While the candles came in all sorts of colors (like fire engine red) I decided against it. After all, there was no telling what else might be in that wax and it could well be that the stuff that makes candles smell good could also make stomachs hurt. So the paraffin it was- it was much cheaper anyway.
It also was transparent, and I specifically wanted a red cheese. Luckily, the kids of one of my buddies was able to help me out, and the solution came in form of a bright red crayon, straight out of their art box. It was specifically non toxic. And if parents aren't worried about their kids inevitably eating those crayons, I wasn't going to worry about that crayon around my cheese. I was in business!
The actual waxing was easy enough: Heat the paraffin in a small (but wider than the cheese) pot and melt and stir the crayon in. Obviously, the mix has to be hot enough to be liquid but otherwise only hot enough. Some of that wax will likely splatter on skin at some point in the process and if it does, hot feels better than really hot. Once the wax was liquid and all mixed up I first dipped the top into the cheese, immediately pulled it out and let it dry. Then I turned the cheese in my hand and did the same with the bottom of the cheese. I repeated both top and bottom a few more times to build up a bigger layer of wax.
This left me with a narrow uncovered strip of cheese along the sides. I guess one solution would have been just to dip the sides, one section after another until I got around. I decided to use a paint brush (unused!) instead. It worked very well indeed though this was the point when I discovered you don't want your wax too hot. Anyway, my cheese soon had a solid hard layer of wax all around it. The only problem? Well, it wasn't red:

Obviously, that single red crayon had not quite had the effect I had been hoping for. I guess I could have kept dipping my cheese into the was to build up a bigger shell but it was obvious my cheese would never be fire engine red. So how would I fix that the next time? Well, one possible solution would be to throw more crayons at the problem. Though I was extremely hesitant of raiding the kids' art sets of what remaining red they might have in there. And I don't think you can buy red crayons without building a stock of blue, yellow, and other useless colors as well.
Or maybe I can score a lipstick from someone? I suppose there must be tons of them that are no longer fashionable on lips but would still look great on my cheese. And surely they are non toxic as well, or at least I really hope so. Food coloring might help as well though I am not sure if it dissolves in wax and can withstand the heat without breaking up.
But I am getting ahead of myself. I do want to first find out how this cheese works out before waxing any additional ones. And that I won't know for two more months if I am to believe my Internet sources. If I have the patience to wait that long that is ---
Friday, May 24, 2013
Maryland chicken bread
OK, I will admit to it right away: The only chicken in this bread is the chicken fat I used to fry the onions. But it still makes for a great name and sometimes, that's important, too. Anyway, I was on the prowl again, trying to find another winning bread recipe. This time, it was all the chicken grease left from boiling down four pounds worth of chicken that caught my attention. I had already discovered that grease from bacon does bread good, and I like onions anyway, in particular fried and as part of my bread. So what would seem more natural but to use all that chicken fat as part of my latest batch of bread?
I started out in my standard way: Mix four cups of general purpose what flour with two cups of water and add my sourdough starter. Cover the bowl and leave alone over night; the result should be a very active, bubbly dough. The second stage calls for the addition of slat, an extra four cups of flour, and an extra cup of liquid. While I always stick to all purpose what flour and water in the first stage I do grant myself more freedom in the seconds stage. For example, I have used rye flour in the past and with good success. This time I opted for two cups of additional all purpose, and two cups of whole wheat flour. And for the liquid I used a cup of chicken broth (without the fat, I needed that for the onions). After all, I had more broth left over that I could likely use- so I may as well do the experiment.
After another night of fermentation the dough was almost climbing out of my bowl! While the rye in the past seemed to retard fermentation a bit the new combination yielded the strongest development I had seen so far. Of course, there is no telling whether this was due to the whole wheat flour or the chicken broth. While it will take another experiment to settle this point I would have to guess it's the whole wheat flour. Why? Mostly, because I want it to be the whole wheat flour, and to me that's reason enough.
So I got my dough, consisting of eight cups of flour and three cups of liquid. It was fermenting very well and I figured it had enough punch for at least two cups if not four of extra stuff, ingredients that would supply flavor and aroma, but would develop little or nothing to crumb and crust development. And it is here that all the chicken fat and the onions come in. I used all the grease I had; I think it was almost a cup of it. As for onions I had used about a medium sized onion per loaf of bread the last time and it had left me wanting more. So make that two medium onions per loaf. And with enough dough to make four loaves of bread that was eight onions to peel and chop. It was definitely the low point of this baking experience.
When frying the onions I started out with big pot full of onions but I was surprised how much the volume had come down by the time the onions were well browned. The remaining mixture of fat and onions was maybe two cups- definitely not more. And very greasy indeed!
Anyway, I mixed everything well and formed my four loaves. Usually my dough is on the dry side- easy to work with (like playdoo) and very sticky. This dough here was so greased up it would not stick to nothing. And it was so soft it would not hold a shape- so bread pans definitely are required equipment for this type of bread. With my loaves in the bread pans I let them sit at room temperature for the next three hours, while running some errands and a lot of kitchen cleaning.
When I returned to my bread loaves they each had about tripled in volume. The top surface which would usually have started to dry out after that much time in the open was still so soft I could not even score the bread properly- I basically just poked lots of holes into the loaves with the tip of my knife, trying to convince myself this was doing any good. I debated with myself whether there was any point in waiting any longer but decided against it. The dough was too greasy to expect it it dry more within any reasonable time, so I may as well go ahead.
I gave my bread the standard oven treatment: 400°F, for at least 40 minutes. What I actually did was spray the bread with water every 15 minutes, and then after 40 minutes start monitoring the bread carefully. I left it in until the crust looked like if should not take any more which was about 50 minutes. Then I removed the bread from the oven, and the loaves from the pans (which was easy with bread loaves greased like that).
And --- it was a very pleasant surprise! The bread smelled great; great enough to bake more in the future just to have it sit around and smell! Even better, it tastes pretty good, too! Good enough I am eating it without anything on it or with it- it does not need anything. Maybe a little bit more salt next time, either mixed in with the onions or added to the dough. After all, the dough had been fermenting so well I am sure it could tolerate the extra salt and still ferment pretty good. Oh, yes, and before I forget, I do think the bread would be even better with maybe a few more onions ---

Anyway, it has been a great experiment, and I am sure there will be refinements in the future. Also, the effect of whole wheat flour on dough development needs checking out. Or what other types of flour will do, like corn or rice flour. Or oatmeal, doesn't that sound interesting? So many breads to bake- I do have to make an effort to recruit more people to eat it!
Thursday, May 23, 2013
Hobo's Delight, recipe v1.01 (III)
It is time to finish up out batch of beer. In previous steps, we cooked the wort and set up the fermenter, we followed the wort through fermentation, and turned the green beer once for better clearing of the still suspended yeast. As I mentioned in the last post, it took this batch just two days to clear. However, there is no harm in waiting a little longer: I have heard from people in the past who would leave their beer a couple of weeks in second fermentation, until they finally found time for bottling.
I am not that kind of patient, in particular since it takes the beer another ten days in the bottle to fully mature. So just two days after the start of second fermentation I was ready to bottle. And here is what it took:
Equipment:
Ingredients:
I am not that kind of patient, in particular since it takes the beer another ten days in the bottle to fully mature. So just two days after the start of second fermentation I was ready to bottle. And here is what it took:
Equipment:
- Brew bucket, six gallon capacity (and a marker where the six gallons are), ideally with a spigot near the bottom.
- The piece of plastic hose already used for siphoning the beer into second fermentation.
- A bottle filler; this is a nifty little piece of equipment that makes bottling a little easier.
- Enough beer bottles to hold six gallons of beer; in my case that was 63 12 oz bottles. There was still beer left over after filling those but I drank that leftover on the spot. Make sure it's not screw off bottles but the kind that needs a bottle opener. Screw off bottles will not hold a good seal.
- Bottle capper and bottle caps.
Ingredients:
- Ordinary table sugar, one cup.
- Extra water.
- As always, disinfect all equipment before using it on the beer. This is not as critical now than it was before fermentation, but still.
- Siphon the beer from the carboy into the brew bucket much like when you moved the beer into second fermentation. Again, move the bucket onto an elevated position.
- Dissolve the table sugar in about a quart of water and add it to the beer.
- Add additional water to the beer up to the six gallon mark. Mix well.
- Give the (hopefully clean!) bottles a last rinse- with water, not bleach!
- Fill the bottles. If using a bottle filler, follow the instructions that came with it. Be careful not to overfill when using funnel and pitcher. Actually, you are almost bound to overfill a few bottles at first but you will get the hang of it. I actually put each bottle into a big bowl before filling it to cut down on the mess I was making.
- Put the bottle caps on. I cannot be more specific than that because the exact procedure depends on the type of capper (which hopefully came with instructions). If doing it for the first time it might help to first test cap a bottle of water and turn it over, just to make sure there is a good seal.
- Move the bottled beer out of the way- it needs to age for at least ten days before it is at its best. In the meantime? That's why we made 63 bottles: Ten six packs, and one bottle to try after three, six, and eight days.
- Don't forget to drink what's left over at the bottom of the brew bucket while cleaning everything up. It will definitely still taste very green and unbalanced- but it's your very very own, and for that you will like it!
Monday, May 20, 2013
Hobo's Delight, recipe v1.01 (II)
The first installment of my Hobo Delight beer recipe focused on cooking the wort and getting the fermentation started; this part will cover the fermentation.
In that last post I stated that fermentation should start within 12 hours, or 24 hours at the most. Mine started after six, and had really taken off after about 10 hours. This was not only faster than in my first patch, it was faster than any batch I remember from a former life in Florida. I figure it may have been faster than the last batch because the ambient temperature was a little higher, and that it was faster than in Florida because I am now using a different kind of yeast. That is always a thing about brewing: Minute things can make seemingly big differences. Luckily, those seemingly big differences rarely have baring on the final outcome.
Well, this particular fermentation not only started fast, it finished fast as well: Three days must be the fastest fermentation ever heard of! And the stop of fermentation was not gradual either: It was still going strong at night, but had ceased entirely the next morning. Again, this is not what I typically see. The normal would be for fermentation to mostly stop, but linger on at a low level for at least another day. I just put it on yet another seemingly big difference that would not make a difference down the road.
Honestly, it is not the quick fermentation I worry about: The window of opportunity for bad things to take over and spoil your beer is from the moment you take the wort off the stove, until the alcohol concentration in the fermenting wort becomes too high for those bad things to survive or even thrive. Yes, there is also a chance that the wort does for some reason not ferment all the way (suddenly all the yeast dying- is that possible in a sealed off carboy kept at a reasonable temperature?) but since my fermentation had been vigorous the days before I figured my beer would be good.
After five days my carboy still looked very much like it did after three: There was a thick 3/4 inch layer of yeast sludge at the bottom, and nearly 5 1/2 gallons of dull looking brown beer on top of it. The yeast was no longer producing but lots of it was still very much in suspension and without any apparent intent of setting any time soon. I therefore decided to add a quick second fermentation step to my process.The purpose of a second fermentation process is mostly to clear the beer. Sometimes, sometimes adjuncts like extra hops or spices are added to enhance flavor or aroma but I had no plans of doing that. So here is what I did do:
- Equipment:
The very carboy and airlock that is currently holding the fermented wort.
A bucket big enough to hold hold all the wort currently in the carboy. A six gallon brew bucket will do fine.
A piece of plastic hose to siphon the wort (or green beer, now) from the carboy into the bucket and back. Home brew stores sell auto-siphons which make the process indeed more convenient but it is easy to get by just with the hose. - Extra ingredients:
None - Disinfect the bucket and the hose. I use the same 1/2 cup of bleach to five gallons of water solution as when I prepared the wort. Rinse both to get all remnants of the bleach off.
- Rig the carboy and bucket such that the carboy is way higher than the bucket. Kitchen counter to kitchen floor is a combination that works for me.
- Siphon the beer from the carboy into the bucket. When using hose then the hose needs to be primed with clear (i.e. unbleached!) water. When using an auto-siphon then follow the instructions that came with the equipment. In any case, leave the bottom layer of the thickest sludge in the carboy- we don't want it anymore.
- Rinse the carboy carefully. I do that in the bath tub, dumping the yeast sludge into the toilet next to it. Make sure to clean the inside of the carboy off remnant yeast and hops residues. I don't bother bleaching it as the inside was only in contact with the very beer that's about to return to it.
- Reverse the positions of the (now full) bucket and the (now empty) carboy: Bucket goes on the counter, carboy on the floor.
- Siphon the beer from the bucket back into the carboy. There should not be much of a sludge layer at the bottom of the bucket yet, so there is nothing to worry.
- Replace the airlock, return the carboy to its hiding place.
Saturday, May 18, 2013
Bread plays
All my bread from the last batch is gone and I had actually fun eating it. The pure sourdough breads tasted better than the ones with the extra yeast- because the extra yeast had left behind a tiny but discernible yeasty taste and it's not necessarily a good taste. So I decided the extra yeast was not be worth it. Sourdough alone can do the job, and it actually tastes better.
Another thing I could not help noticing is how quickly bread ages. It tastes like something from paradise when it is still warm from the oven. It tastes great the next day, and so-so on the next. Any additional days and you just hope to get done with it and move on to a new batch. However in the long run, I want to only bake once a week, or twice at the most if somebody else will be eating, too. Meaning I need to figure a way the make the bread taste great for longer. Which, though, is a quest for the future because today's quest was to make even more bread.
My first dough was the standard fare: Add the starter to four cups of wheat flour (unbleached, all purpose) and two cups of water, mix well, let sit. I have to admit the "let sit" part has become a little informal lately. I literally let it sit over night. And since I had to go to work the next day I had it in the fridge for ten more hours after that. Needless to say, my dough was very bubbly after that.
After that came the fun part: I separated the first dough into four equal batches for further experimentation. To the first part I simply added another cup of all purpose wheat plus a quarter cup of water, plus a teaspoon of salt. This mirrors my standard formula, and meant to represent my control experiment.
In the second batch I used rye flour instead of wheat, and also added that extra quarter cup of water and the salt. Rye breads (or rather, half and half) are pretty much the norm where I grew up in southern Germany, and I was curious whether I would get anything resembling the taste of home.
Batches three and four resembled batches one and two (i.e. one wheat, one rye) but with a twist: I cut about 6 oz of bacon into little pieces, fried it, and used the fat to brown two medium onions (also cut into little pieces). The result, fried bacon pieces, browned onion pieces, and a fair amount of fat I added in equal proportions to my batches three and four. Before forming the loaves I let each batch sit for another night, followed by another day in the fridge.
I formed loaves from each of my batches, put them into their baking forms, and once again let them sit. Actually, I went for a run while they were sitting and when I run I tend to run for a long time. Meaning these loaves had been sitting for about three hours when I got back and were about twice the size they had started with.
The baking was the normal fair, 45 minutes at 400°F, in accordance with my observations the last time I baked, and the same for each of the loaves. And the result has been very pleasing to say the least:

The straight what loaf is to the left and the straight rye is next to it. Then the bacon/onion wheat, and the bacon/onion rye is all the way to the right. Looking at the loaves from the side

reveals first of all that my score marks were ineffective. Both wheat breads broke up wherever they wanted instead along the score marks. But that's easily fixed- I just need to score after forming the loaves next time rather than waiting until just before I put them into the oven.
More interestingly, wheat dough obviously rises more than rye, so (keeping everything else equal) wheat bread is fluffier and rye bread is denser. The bacon/onion breads to the right look bigger than the straight breads to the left but I think that just reflects the added volume of the bacon and the onions. But it is certainly safe to say the addition of the bacon and the onions did nothing to impede the development of the dough.
Best of all, all breads taste great. Even the straight wheat is an improvement is an improvement over last time, most likely on account of the extra five minutes in the oven. The rye bread is great too and I would say better. The rye seems to go well with the sourdough flavor- positively a keeper recipe. And the bacon/onion loaves are just delicious, both of them! Like bread with built in Schmalz. I can't really decide which one is better but it is safe to assume I am going to go with this combination again, in the not too distant future!
So what will I take away from this experiment? Here are the most important observations:
- I good sourdough bread takes two days to make. It's only about an hour's worth of work and the dough will be sitting on the counter or in the fridge almost all of this time but still: The dough needs time to develop.
- Pure wheat dough rises more than a wheat-rye mixture. I could imagine a pure rye bread would turn out extremely dense but that's of course just speculation at this point.
- Extra non-starchy adjuncts like bacon and onions do not affect dough development. If anything then the extra fat made the dough easy to work while kneading and making the loaves.
- Score the bread immediately after the loaves are formed. The score marks won't do much good after the dough has fully risen.
Thursday, May 16, 2013
Toward real cheese
It has already been a few days since I made my first attempt at my dream cheese, that little wheel in red wax. There are no results yet because successful cheese takes about two months. Failing tends to go a lot faster- but while I suffered through a minor crisis already, I am still in the game. And before I forget the things I think I found out I better report. What follows is far from a complete recipe; rather, it's a collection of notes on this first attempt at a real cheese.
The initial steps are much like for rennet cheese: Start with gallon of regular milk, let it get to room temperature, and add some starter. For the rennet cheese I used buttermilk, this time I used yogurt- mostly because it was older and needed to be used up. Let sit over night, then heat to 85°F and add 1/4 tablet of rennet dissolved in 1/4 cup of cold water. Let sit for another couple of hours after which the rennet should have gelled the milk into a curd. Then cut the curd into small cubes, just like for the rennet cheese.
Now the procedures get different. Rather than draining the whey off the curds immediately, slowly head the pot with curds and whey to 100°F while stirring almost constantly. That heating and stirring will take at least 15 minutes and should continue until the curds flakes have hardened and settled into pieces a like cottage cheese. Only then strain the content of the pot through a flour sack to get rid of the whey.

Following my instructions I added two teaspoons of salt next and worked it into the curds. The resulting mixture tasted rather salty but hey, I was just following instructions. Next I lined my cheese press with the flour sack and set up my cheapo cheese press. Over the next eight hours it was waiting and an occasional tightening of the clamp. I was surprised how little extra whey was draining but not overly concerned at that point.

When I removed the pressed cheese after eight hours it was way too soft and way too wet. Even a first timer like me could readily see that. Yet, I was still determined to stay with the program- which called for the cheese to be rubbed in salt. Except that cheese would not even stick together when I tried to rub. At this point it also occurred to me what must have happened: Little pieces of curd had clogged the pores in the flour sack almost immediately, and after that very little additional whey was able the drain from the cheese.
So far, so bad! This was obviously not going to work and my options were to give up or to improvise. I chose the second: I scooped the entire broken mess back into my cheese press, this time directly and without any lining. Not the cleanliest and most hygienic thing for sure but this was time for worry about bacteria. Besides with the cheese effectively double salted by now I doubted anything harmful to man would be able to live in there.
I pressed the cheese for another couple of hours and a lot more whey drained out. A little bit of the cheese managed to escape through the holes of the cheese press cylinder but this was really negligible. And when I removed the cheese for a second time from the press, it actually held together. I decided to forego the salt rubbing this time. The cheese would probably have held up but I figured the last it needed was any additional salt.

I just wrapped my cheese into a fresh flour sack, put the whole pack into a small bowl, and the bowl into the fridge. Since then, I have been checking it every day, replacing the wrap if it felt wet. They picture above shows my new pride as it looks now, after four days. I am waiting for the something like a rind to form which supposedly can take a week or two. Which is as well- after all, there is a lot of red wax I have to come up with before I can proceed to the next step!
Wednesday, May 15, 2013
Sourdough notes
As already reported my last sourdough bread experiment left me with a lot of dense bread. But after living on that bread (and my rennet cheese) almost exclusively for the last few days I was ready for a new batch. I followed the protocol described in my last sourdough post:

- Mix the starter with four cups of flour and two cups of water, cover and let sit for a day,
- Add another four cups of flour, four teaspoons of salt, and one cup of water (the extra cup of water is new), let sit for another two hours or so,
- Form and score the bread loaves (four bigger sized loaves this time instead of the six smaller ones), let sit for another half hour,
- Bake it while spraying it with water every ten minutes. Total baking time was 40 minutes at 400°F, up from 30 to 35 minutes from the smaller loaves made without the extra water.

Of course, there are some observations to carry on toward the inevitable future experiments:
- I does not seem the extra yeast has made much difference in the finished bread (though it seemed as if the dough with the extra yeast had risen I little bit more before baking). So even if there is a difference it is not very significant- at least not for the pure wheat bread I am currently making.
- There were a few spots in the crumb that seemed a little too wet. I believe I can fix that by baking the bread a little longer the next time around. The crust also looks as if it could take some extra minutes of baking without me having to worry about it getting burnt.
- Once again, the salt is not all evenly distributed. Next time I will try dissolving it in the extra water added in the second stage of the dough making.
So stay tuned!
Tuesday, May 14, 2013
Cheapo cheese press
When I was reporting on my first rennet cheese I kept mentioning those big red wheels of cheese that are sometimes on display in the supermarket. While it is of course impractical to make big wheels of cheese in a small apartment I figured I should be possible to make a little wheel of cheese, still with wax around it but only a couple of pounds or so. There sure are plenty of recipes on the Internet suggesting I could and if I could keep my investments low I figured it was worth a try.
I selected the recipe that sounded the easiest, and I already knew how to get started: It would be a lot like the rennet cheese. The key new step would be to press the curds, and for that I would need a cheese press. It is possible to buy a cheese press online, they go from anywhere between $60 and $350, so even the low end of that range was more than I had in mind by "keeping my investments low".
What I did come up with was the following: A length of 4 inch diameter PVC pipe, available at any home fixing store. That's the kind that drains toilet waste into septic tanks. I know what you folks are thinking but I actually bought a piece of new pipe rather than finding a piece of used one. My cheese press would use 7 inches of it. I know I way overpaid for that piece of pipe barely long enough to make three cheese presses, but thinking of the online cheese press prices I was happy to pay only $6.

My stoppers I found at the local crafts store, in the form of plaques for wood working projects ($1.50 for the two of them). They were 4 inch in diameter as well and just so fit into the ends of my piece of pipe. To one of the pieces I attached a small piece of 1x2 so I would have an easier time to get it on and off the pipe- because the fit was really rather tight. This piece would be the bottom of my cheese press. From the other piece I shaved about 1/32 off the diameter so it would slide in and out of the pipe rather easily. That even left a little margin if I wanted to line the cheese press on the inside with cheese cloth- my recipe suggested I would want to. This would be the piece that would go in and out and exert the pressure on the curds.

Now came the only piece of handiwork in putting my cheese press together: With my power drill I drilled about 1/8 inch 200 holes into the pipe, at roughly equal distances. I drilled another 20 or so holes into the bottom pieces. This was how I wanted the whey to drain out of the curd. I did not drill any holes into the moving piece because I wanted the whey to drain through the bottom and the sides, not to the top.
The final pieces of my cheese press were a clamp (out of the toolbox, or from the hardware store for $14), a dish washing bowl (out of the kitchen, or for $2 from the department store), and a place to rig all this. I used a little Workmate that I would usually use for cutting projects.

The photo shows my cheese press assembled and in action. It works well too though not when using a flour sack as a liner as depicted in the photo. But that the the subject of another post that has not yet been written. The pressure needs to be readjusted occasionally but that's probably true of most of the Internet cheese presses, by the look of them. And coming in at under $10, I believe it's a design that's hard to beat!
All well in the yogurt department
Yesterday night I started a new batch of yogurt, and with quite some trepidation after the "runny" batch I produced last time. Not that I really should have been- after all, I believed my analysis of the causes of the runniness was sound, and my planned fixes seemed appropriate as well. Yet, there is always that residual worry- in this case that it might be my starter turning bad after all.
Well, the news is good. I stayed with the hot milk as it cooled to make sure I would pitch my starter the moment my pinkie could tolerate the heat of the liquid for ten seconds. I wasted little time wrapping the covered bowl into my beach towel and transferring the wrapped bundle into the oven. And as planned, I left the oven light on as the yogurt was incubating over night, as to "harvest" that little extra heat emitted by that tine light bulb.
And the result? Very satisfying: Firm almost like store yogurt, and the same pleasant tartness I have grown accustomed to. So it seems fair to say it is a too low incubation temperature that causes runny yogurt, at least with my personal ingredients and procedures.
With this settled, should I just leave it now and stop tweaking with the formula? I probably should, and I most certainly won't. After all, I am still curious whether I can make firm yogurt without the addition of milk powder, by using full fat milk instead of the 2% milk I am using now. The last time I tried I failed. But then, I also wondered if my incubation temperature was warm enough that last time when I failed. So I think the time has come to try again.
Monday, May 13, 2013
Hobo's Delight, recipe v1.01 (I)
So here we go:
- Equipment:
A big brew kettle, volume at least five gallons. For most of us, that a big pot. Pretty much any pot will do but some are better than others. I decided to pay extra for a sturdier pot with a thicker bottom, and I experienced no scorching and burnt residue in two batches. With cheapo pots I used in the past I pretty much always experienced some scorching.
A big spoon, used to stir the cooking wort. Use metal or plastic, not wood. Wood is more likely to carry some bacteria and we want to keep our wort as clean as possible for as long as possible.
A kitchen scale, for measuring weights up to a pound.
Plastic jugs, to hold three gallons of water.
Carboy, six gallons, with a fitted air lock. That probably means a drilled stopper as well, to connect the air lock to the carboy.
Funnel, strainer, and ladle, to get the wort from the brew kettle into the carboy. I actually paid money for my strainer but I can think of all sorts of substitute contraptions from things laying around the house. The strainer must fit into the funnel and is for keeping most of the spent hops out of the carboy. For the ladle, I use a small stainless steel cooking pot. It's way bigger than a standard ladle and hence more efficient. - Ingredients:
Water, 5 1/2 gallons.
Dry Malt Extract, amber, 5 pounds.
Ordinary table sugar, 1 pound. For extra kicks.
Hops pellets, Cascade, 1.6 ounces. This is where the kitchen scale comes in handy.
Yeast, one sachet (11.5 g), Safale US-05. That seems to be the most common brewing yeast these days, judging by the two stores sampled. - The evening before brewing day, put the plastic jugs with three gallons of the water into the fridge. The idea is that it will be cold in the morning. Just before commencing the brewing, transfer that water into the freezer. The idea is we want it as cold as possible but not frozen.
- Fill the brew pot with the remaining 2 1/2 gallons of water. Add the malt extract and the sugar. Put the temperature on high. Nothing much will happen for quite a while except for the water slowly getting warmer. The malt most likely will have turned into a thick dry crust floating on top of the liquid. Don't worry, that's normal. It will break up and dissolve eventually.

- As the water really gets hot and the malt starts dissolving it is time to stir the put regularly to prevent scorching of the bottom layer sugar and malt, in particular with a cheapo pot. Also, this is the time to keep a close eye at the pot to catch it and turn down the temperature the moment the liquid reaches boiling. Boiling wart is finicky just like boiling milk, and even the just 2 1/2 gallons of wort will readily climb out of that 5 gallon pot to create a huge smelly mess.
- As the liquid reaches boiling turn down the temperature. On an electric stove, the pot may have to be pulled off its burner to prevent it from boiling over. Adjust the temperature to keep the liquid boiling vigorously, but with a comfortable safety margin from the top of the pot.
- Add one ounce of the hops. Gradually, don't dump it all at once, or the wort will start climbing again.
- Keep boiling the wort for one hour, stirring maybe every ten minutes, or more or less frequently, depending on the confidence that the brew kettle won't scorch the malt.
- Add the remaining 0.6 ounces of the hops, boil for five more minutes. The original hops was for flavor, cooked for so long as to kill its aroma. This hops is to restore the aroma, but it won't cook long enough to generate much flavor.
- While the wort is boiling, prepare the rest of the equipment. Everything that comes into direct contact with the hot wort should be disinfected. I do this by filling a bucket with five gallons of water and half a cup of bleach. Then I keep the airlock, strainer, funnel, cooking pot, submersed for a few minutes, and take them out of the bucket and rinse just before I use them.
For the carboy, I put some of the bleach solution inside, shake it strongly, then pour out the bleach. Then I repeat the shaking and pouring out with a small amount of tap water.

- Also while the wart is still cooking, get the three gallons of ice cold water from the fridge and transfer them into the carboy. The funnel will come in handy.
- As soon as the cooking time for the aroma hops is up, turn off the stove and remove the kettle from the heat. Put funnel and strainer on top of the carboy and ladle all of the wart into the carboy. What I did was get a big piece of cardboard (like from the nearest trash container) and put it at the bottom of my bath tub. The cardboard should be big enough so that the carboy and the brew kettle can sit on the cardboard inside the bath tub side by side. This not cuts down on the mess, it also makes any cleanup trivial.

- Get a feel for the temperature. A thermometer comes in handy but isn't necessary. Just feel the outside of the carboy. The combination of the ice cold water and the hot wort shoudl result in a pleasantly warm but not hot feel. For thermometer users, the cutoff between warm and hot is at 100°F.
- Once the wort is warm instead of hot add the yeast. No special preparation necessary for this type of yeast, just sprinkle it in. Finally, attach the air lock.
Once fermentation finishes the beer will be ready for the next step. Of course, I will be reporting as soon as it happens.
PS:
For reference, I actually took a initial specific gravity reading of my beer before I added the yeast (not part of the description above). The initial specific gravity basically means the temperature adjusted specific weight of the wort prior to fermentation. It was at 1.047 kg/l. Which means it has the potential for some pretty strong beer, with a 6.5% alcohol content. Of course it depends on how many of the sugars actually ferment into alcohol. Well, we will see. And I will report later.
Sunday, May 12, 2013
Water versus yeast in dough
Most if not all of my sourdough breads turned out rather dense. Some actually were dense to the point of being almost impossible to chew, and even the softest was only marginally fluffier than pumpernickel. I developed two alternative theories as to why that would be:
So this weekend I decided to launch the control experiment, by first making another batch of the dry dough:
From that point on, I once again treated both batches the same:

- My sourdough just isn't that good at raising the dough. After all, sourdough is based on wild yeast which may not be as good making bubbles than a yeast bread in the lab for the expressed purpose of producing lots of bubbles.
- I am not using enough water. My low water dough works and feels like play-doh which is great. But it may be the yeast paying the prize for my non-stick dough by not having enough water to develop.
So this weekend I decided to launch the control experiment, by first making another batch of the dry dough:
- Mix the sourdough starter with four cups of flour and two cups of water. Allow the starter to ferment that dough until the dough is thoroughly bubbly.
- Add another four cups of flour and four teaspoons of salt, work everything into my typical non-stick dough.
From that point on, I once again treated both batches the same:
- Knead the dough thoroughly then let it sit over night so the dough can rise as much as it wants to.
- Knead the dough one more time, form the bread loaves, and put them into their oiled forms.
- Bake the loaves while periodically spraying them with water until they appear to be done, half an hour at 400°F in each case.

Yes, me too. There is no discernible difference at all. Both are the size of a large dinner roll. But make no mistake they each have the weight a small loaf of bread is supposed to have, about 10 ounces.
And it wasn't just a fluke because I made three loaves each. If there is any difference at all it is not in the size of the loaves. Rather, the "sourdough plus yeast" bread has a few more cracks. I could speculate as to why that would be but I won't.
What we can now pretty much take for granted is the following: My dough is too dry and that's the limiting factor right now. Nothing else will make a difference unless I use more water in my dough first.
We do not know yet whether sourdough is just as powerful fermenter than baker's yeast. It could be that baker's yeast performs better once the water constraint is removed. Which would make another neat experiment- after I am done eating those six high-density loaves resulting from this experiment, that is ---
Friday, May 10, 2013
Hobo's Delight
As the regular reader of my blog will recall I was brewing a six gallon batch of beer two weekends ago, and bottling it last weekend, on Sunday, to be precise. Since then it has been sitting on a shelf, all 63 bottles of it, aging and maturing. I figure most of the development will happen within 20 days, so that long I ought to leave it alone before judging and drinking it.

Except, 20 days is a very long time to look at beer and not drinking it. So I decided three of the 63 bottles would volunteer to go early, as a preview; one going after five days, the next after ten, the last after 15. Well, it is day five today, and with the day's chores behind me, I decided it was time to test the first bottle.
While I opened that first bottle carefully over the sink (which proved unnecessary as there is very little fizz yet) I also decided my home brewed beer needed a name. And given that me expressed goal was to develop a recipe that is both cheap (no more than $3 per six pack) and good (tastes like beer at least twice that much) there beer practically named itself: I am proud to introduce Hobo's Delight, the beer of the penniless, the beer of people with a life too precious to waste on work and bad beer.
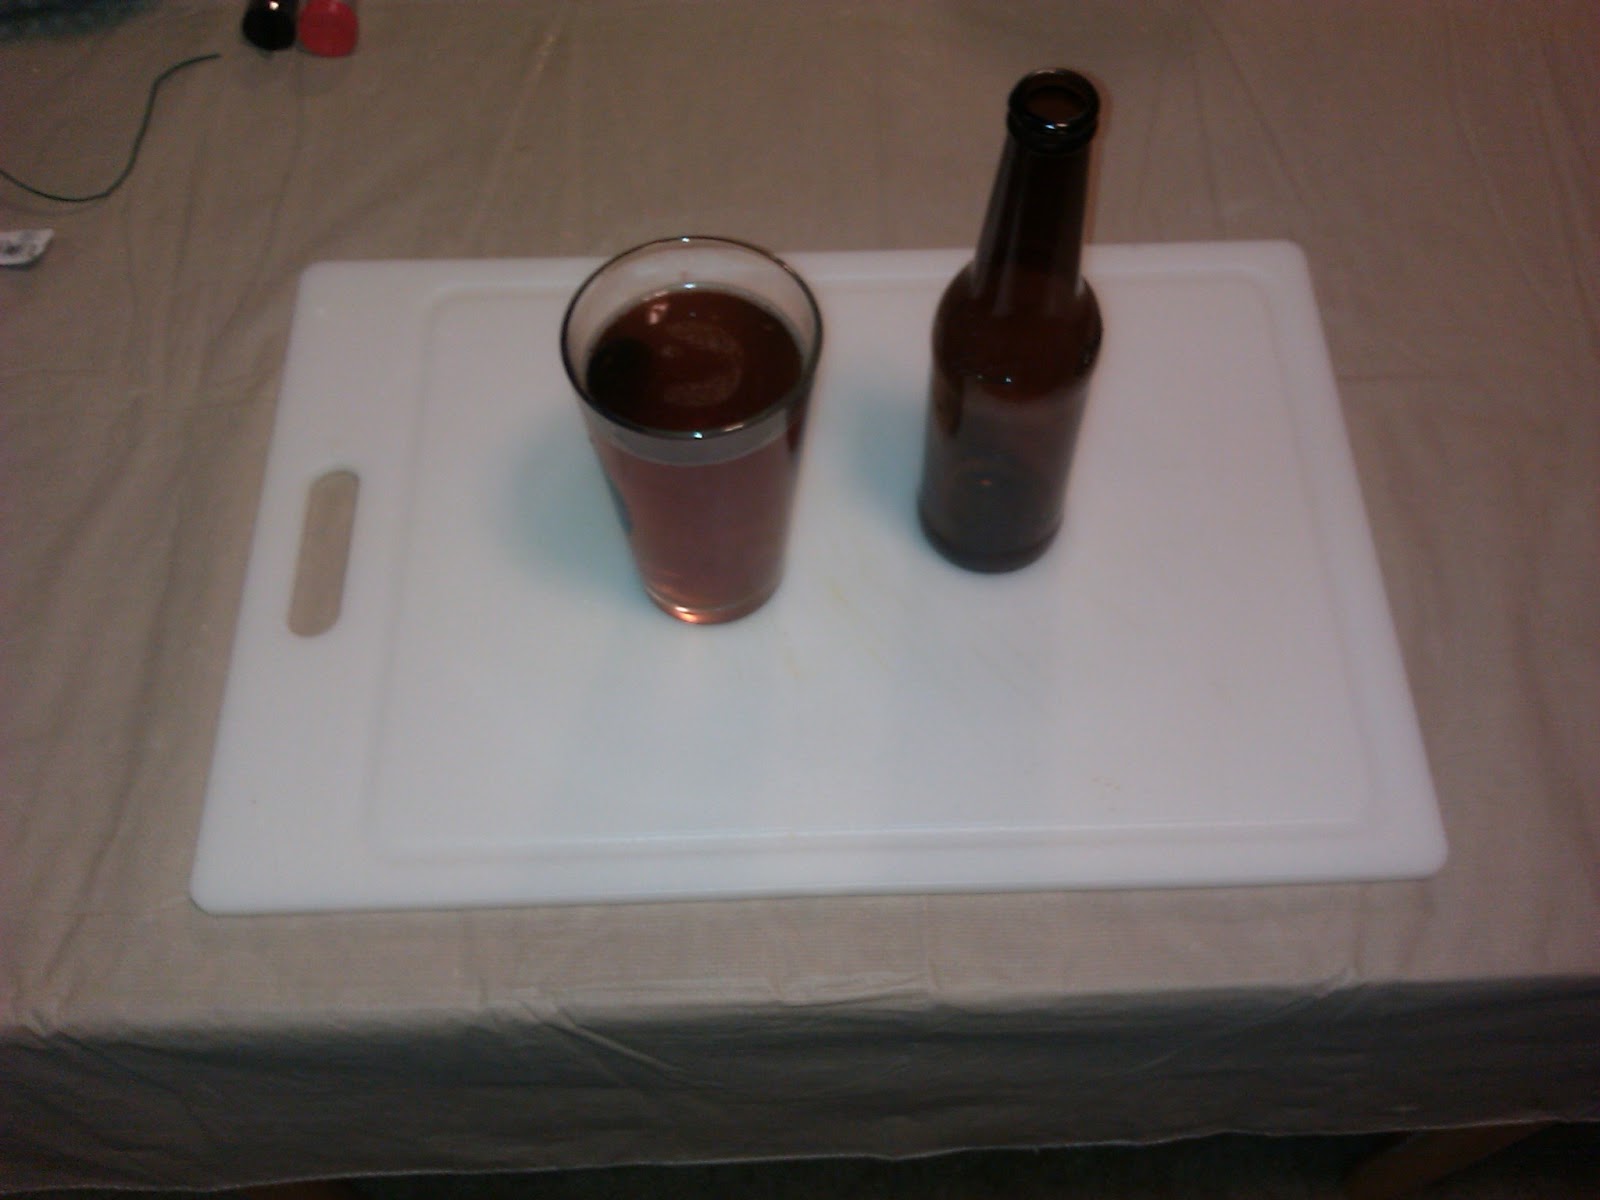
I have not made a formal taste test and I won't until the 20 days of aging are over. However, that won't stop me from making a preliminary assessment right now: I have a winner at my hands! Sure, the beer is still flat but it will get a lot livelier with some more aging. There is not much of a hop aroma; but that will either fix itself over the next 15 days, or I will know how to fix that during the brewing process in the future.
But the malt flavor and mouth feel if just unbelievable, it just about blew me away. It's been five days and already I can think of kinds of beer that tastes worse but costs twice as much in the store. And the beer has a definite kick, too: I just finished that first bottle and I already have a slight buzz! I am sure hobos everywhere will appreciate that in particular!
Of course there has to be some bad news to mitigate on all that joy: There won't be another one of these for the next five days ---
Thursday, May 9, 2013
First rennet cheese
With labneh, and quark conquered I decided it was time to slowly move toward real cheese. Not one of those huge wheels in red wax that are sometimes on display in the stores of course, at least not yet :-) Rather, I would make a simple soft cheese, very similar in consistence to the labneh and quark I had done earlier. After all, you got to start small and work yourself up.
It turned out I had the necessary equipment and ingredients already, though one of the ingredients required a little preparation. Because, for real cheese the milk is not curdled by bacteria as in yogurt or buttermilk. Rather, it uses "rennet", which is an enzyme, and which is not easy to find in regular grocery stores. It is readily available online though, and some home brew stores carry it conveniently as well. I have also been told that many of the ethnic stores have it as well, but had no necessity to verify that. Rennet should cost about $7 for ten tablets, and each tablet will curdle up to five gallons of milk.
So here are is the recipe I following making my first rennet cheese:
- Equipment:
A pot with lid, big enough to hold a gallon of milk. I just used the bowl of my slow cooker
A big knife; its blade has to be long enough to cut through the milk all the way through the bottom of the pot once it has curdled.
A flour sack; available at department stores for about a buck a piece.
A bowl to collect the whey when it drains out of the set curd.
A ladle to spoon the curd from the pot into the flour sack.
Fridge space to suspend the flour sack with the curd in it for draining. The dripping bowl has to fit under it. - Ingredients:
Milk, one gallon,
Homemade buttermilk, 1/4 cup, I read yogurt works as well,
Rennet, 1/4 tablet,
Salt, 2 teaspoons should do (though I used 3). - Get the gallon of milk to room temperature, by letting it sit on the counter or by warming it with warm water in the sink. We are shooting for 65°F though in my case I wound up closer to 70.
- Put the milk into the pot and add the buttermilk. Stir. Let sit for about two hours. The goal is not for the buttermilk to turn the milk but to achieve some slight acidity. The rennet needs that acidity to do its thing.
- Dissolve the quarter tablet of rennet (I broke up the tablet with a big knife) in 1/4 cup of water. The mixture may look cloudy but not undissolved pieces of the tablet should be left.
- Add the rennet solution to the pot . Stir again. Now put the lid on, move the pot out of the way, out of the light but still at room temperature (nominally, 65°F, my place was warmer) and forget about it for the next 12 hours. It must not be disturbed.
- After 12 hours the milk should have set into a soft curd. If it hasn't let it sit another 12 hours. Even if it has set you can still let it sit for extra time. That was the case with me, I had to go to work.
- Once the milk really has set into a curd, cut it with the big knife, from top to bottom, cuts about 1/2 wide. When done do it again, at a 90° angle.
- Line the dripping bowl with the flour sack and ladle the cut curd into the bowl. In the end, just pour the leftover whey and little curd pieces remaining in the pot over the curds in the flour sack.
- Suspend the flour sack in the fridge so it drains its whey into the bowl placed blow the flour sack. The first couple of hours it will drain rather rapidly and it may be necessary to get rid of some of the collected whey.
- After 24 hours of draining the cheese is ready. Remove bowl and flour sack from the fridge. Preserve or dump the whey, then empty the flour sack into the bowl.
- Add the salt. The recommended amount is one or two teaspoons. I used three. While I still made great cheese I now recommend one or two teaspoons as well.
- Work the salt into the cheese. I just used my hands. It worked but the cheese proved rather clingy. I will probably try a hand mixer the next time.
- The cheese is ready. Transfer into a storage container (my cheese just filled a quart size Ziploc container), keep in the fridge.
Tuesday, May 7, 2013
Labneh and Quark
I have fallen for yogurt and buttermilk making to the point that I am now producing way more than I can possibly eat and drink. I have therefore started to not just eat and drink my yogurt and buttermilk, but to also use them as raw materials for other things. By far the easiest are Labneh, and Quark.
Labneh is popular mostly in the eastern Mediterranian where is is found under several different names, such as strained yogurt, and Greek yogurt. Quark hails mostly from central, northern, and eastern Europe. "Quark" is actually the German term for it, and I am quite sure there are at least a dozen more names for it in all the local languages spoken in that area.
The only difference between Labneh and Quark is that labneh is made from yogurt and Quark is made from buttermilk. Apart from that, recipes and instructions are exactly the same. The following recipe yields about 12 ounces of Labneh or Quark, at a cost of about $1 per batch (depending on the price of milk, of course):

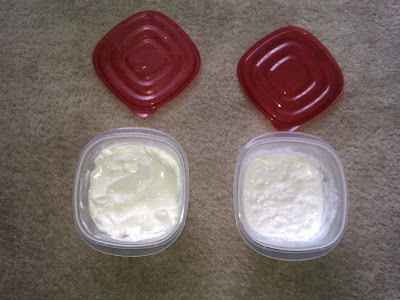
The image to the left shows containers of both labneh and quark. They are actually quite similar in appearance, the labneh being a little firmer and more homogeneous than the quark.
They taste quite similar as well; the quark feels just a tad milder than the labneh. And either one works great either as a spread on my bread or boiled peeled potatoes. Last not least, either makes a great base for a dip when combined with onions, garlic, or chives.
Labneh is popular mostly in the eastern Mediterranian where is is found under several different names, such as strained yogurt, and Greek yogurt. Quark hails mostly from central, northern, and eastern Europe. "Quark" is actually the German term for it, and I am quite sure there are at least a dozen more names for it in all the local languages spoken in that area.
The only difference between Labneh and Quark is that labneh is made from yogurt and Quark is made from buttermilk. Apart from that, recipes and instructions are exactly the same. The following recipe yields about 12 ounces of Labneh or Quark, at a cost of about $1 per batch (depending on the price of milk, of course):
- Equipment:
Flour sack: They can be bought at any department store in packs of four or five, for about a buck a piece. They are typically in the kitchen section, near the dish towels. The flour sack can be washed and reused after this.
Small bowl: To catch the whey from the draining yogurt or buttermilk. Need not be bigger than a quart.
Fridge space: The bowl has to fit and there has to be enough head space to suspend the flour sack with the yogurt or buttermilk over it. - Ingredients:
Yogurt or buttermilk: One quart.
Salt: About one teaspoon. - Add the salt to the yogurt or buttermilk and mix well.
- Line the bowl with the flour sack and dump the salted yogurt or buttermilk into it.
- Move bowl and the flour sack containing the yogurt or buttermilk into the fridge. Suspend the flour sack and put the bowl under it so it will catch the draining whey. My own setup looks like this:

- Leave the yogurt/buttermilk suspended like this for the next 24 hours.
- The labneh or quark is ready. Remove the content of the cheese cloth into its final storage container.

The image to the left shows containers of both labneh and quark. They are actually quite similar in appearance, the labneh being a little firmer and more homogeneous than the quark.
They taste quite similar as well; the quark feels just a tad milder than the labneh. And either one works great either as a spread on my bread or boiled peeled potatoes. Last not least, either makes a great base for a dip when combined with onions, garlic, or chives.
- Leave the draining yogurt or buttermilk suspended over the bowl for about 24 hours.
Runny yogurt again
Once again I wound up with a batch of yogurt that did not set well. It still tastes alright, like it is supposed to, but it is very runny. This happened once before when I was using whole milk and cut the milk powder. Back then I speculated that the milk powder was indeed necessary for well set yogurt, and when the next batch (which included milk powder) was set again I felt my speculation had been confirmed.
The problem is that I did include milk powder in this batch and it still did not set. So I have to look at alternative explanations. The two most obvious are the ones I had already considered the last time: That my starter has somehow gone bad, and that my milk/starter mixture was already too much cooled down when I transferred it into the oven.
I don't think and I don't want to think it is the starter. That there was some thickening and souring suggests that the starter was definitely alive. Apart, I am growing emotionally attached to my starters as "mine", and they just wouldn't feel like mine if I was forced to replace them with new starter cultures from the store every so often.
So I am stuck with the theory that incubation temperature was too low for optimum result. Which actually makes some sense; the temperature of the mixture did seem a bit lower this time than it usually is. As it was with my last runny yogurt, as I recall. Following this approach I will make the following changes for my next batch:
- Stay next to the pot as it cools down so I can catch it before it cools too much. Don't rely on the thermometer but use the pinkie finger test.
- Keep the oven lamp on overnight while the yogurt is incubating. Hopefully, that will keep the incubation temperature higher for longer.
- The yogurt base will once again be one gallon of 2% milk thickened with one cup of non-fat milk powder.
- I will continue to use my own starter which will be a small sample of this runny yogurt that I just made.
Monday, May 6, 2013
More sourdough bread
Educated by three prior attempts at sourdough bread which all failed or succeeded to different degrees I was ready yesterday to give it another try. To recall: All of the prior attempts were too dense in their crumb. They all had a crust that was way too hard and dry. And the salt was unevenly distributed in the last loaf. The first two times I did not allow the dough enough rise time. In the last attempt the dough had risen plenty but I am speculating that the dough was too dry when I formed the loafs. So I needed more water in the dough. So this time around I was following this modified procedure:
 The result were three good looking 14 ounce loafs, except for a cracked crust along the length of the bread; in real on the kitchen counter these loafs were looking better than in the picture. And the cracks should be readily fixed by scoring them next time before putting them into the oven (and that should make them look even nicer, too).
- I mixed my starter culture with a cup of flour and half a cup of water and let it sit in a plastic wrapped bowl until the entire mixture was all bubbly. This took less than 12 hours.
- I added another two cups of flour, one cup of water, and two teaspoons of salt and once again mixed it all up. Again, I let it sit in the wrapped bowl until bubbly.
- I added yet another cup of flour (but no water) and kneaded it all down. When it was still way too sticky to work and form loafs with I slowly added some more flour, maybe another quarter cup total. I sprayed my hands with oil while kneading or otherwise the dough would have stuck all over my hands.
- When I decided it was enough kneading the dough was still trying to sticky, both to my hands and the working surface. And it was definitely too wet that I would have trusted it to retain the shape of a loaf in the oven.
- To enforce some shape onto the loafs I used three 2 pound baking pans. I oiled them down with cooking spray. I divided the dough into three mini loafs and put in in each of the pans. I covered the pans with a towel and then let them rest at room temperature, for three hours.
- I baked the loafs at 400°F for 35 minutes, spraying the top with my water mister repeatedly. I removed the loafs from the pans almost immediately, then allowed the loafs to cool over night.
 The result were three good looking 14 ounce loafs, except for a cracked crust along the length of the bread; in real on the kitchen counter these loafs were looking better than in the picture. And the cracks should be readily fixed by scoring them next time before putting them into the oven (and that should make them look even nicer, too).
The crumb is still dense but given that I am working with pure sourdough I am not sure the crumb could ever be much lighter than this. Too salty? Definitely not, if anything than it is missing some salt. Or rather not. Most eating tables come with salt shakers these days. So it is easy enough to sprinkle salt on the bread if so desired, and I declare myself satisfied with my crumb.
The crust, the worst of all my prior breads, was the best part of this batch, to the point even that I ended up slicing the crust off the bread as a special treat. If anything, it was not chewy enough this time. Which once again seems very fixable the next time, by simply leaving the bread in the oven for a few minutes longer.
While I am very pleased pleased with the outcome of this latest sourdough experiment there are some tweaks of course that I would like to try. These are:
- It seems as if steps 1 and 2 from the above listing could be combined. There is a risk adding the salt earlier may negatively affect the yeast. If so it would prolong the rise time (at best) or keep the dough from fully developing (at worst). But I think the risk is low, and I want to try at least once.
- The bread pans had still plenty of head space when I took then out of the oven. I should therefore use a total of four cups of flour ans two cups of water for the dough. That's 33% more bread for pretty much the same effort.
- Score the loafs before baking. Hopefully that will keep them from cracking lengthwise.
- Bake the bread an extra five or ten minutes for extra crust. The extra dough may affect baking time as well so an extra five minutes may not do. But hey, that's why I spend my time near the kitchen so I can keep an eye on these things.
Sunday, May 5, 2013
Home brewer
Apart from bread and milk products, brewing is another subject that has always intrigued me. To me, a bubbling carboy with fermenting wart is infinitely more fascinating than a fish tank, and getting something out of it that I really like makes the whole deal even sweater. And as with dairy products and bread it is not the execution of a recipe that gives me the satisfaction. Rather, it is to understand the principles behind the process. In the end I want to make and adapt my own recipes, for a brew that's best for me.
So here is the challenge I have given myself: Each batch of beer should yield 60 12 ounce bottles of beer, so we are talking almost six gallons per batch. The ingredients per batch should not exceed $30, at least not once I got the system down. Finally, the beer I make taste at least as good as beer sold for $6 per six pack at the store.
I started my first batch on April 25, which was eight days ago. For the wart I used the following ingredients:
Well, today was bottling day and I got 63 bottles out of it, Well, of course I would because I added carbonation sugar and additional water to my bottling bucket up to exactly the six gallon mark. I even had about a quart of beer left for immediate taste testing.
Obviously, the beer was still green, with the malt and hops flavors strangely out of whack. There is little hop aroma yet, and of course, the beer was totally flat. I preferred it to a Budweiser already but then I am probably biased. The real test will come in about 10 days after the beer had a chance to age in the bottle for a while. And then I will have a friend do the testing so there won't be a question of bias.
And only then will we know how much this first attempt at budget brewing is really worth.
So here is the challenge I have given myself: Each batch of beer should yield 60 12 ounce bottles of beer, so we are talking almost six gallons per batch. The ingredients per batch should not exceed $30, at least not once I got the system down. Finally, the beer I make taste at least as good as beer sold for $6 per six pack at the store.
I started my first batch on April 25, which was eight days ago. For the wart I used the following ingredients:
- Five pounds of amber dry malt extract, at $5,00 per pound,
- One pound of sugar, for $0.50,
- Half an ounce of bittering hops (Cascade), for $1.00,
- Another half ounce of hops for aroma (also Cascade), for another $1.00,
- And finally, a sachet of yeast (Safale US-05) for fermentation, for $4.00.
Well, today was bottling day and I got 63 bottles out of it, Well, of course I would because I added carbonation sugar and additional water to my bottling bucket up to exactly the six gallon mark. I even had about a quart of beer left for immediate taste testing.
Obviously, the beer was still green, with the malt and hops flavors strangely out of whack. There is little hop aroma yet, and of course, the beer was totally flat. I preferred it to a Budweiser already but then I am probably biased. The real test will come in about 10 days after the beer had a chance to age in the bottle for a while. And then I will have a friend do the testing so there won't be a question of bias.
And only then will we know how much this first attempt at budget brewing is really worth.
Subscribe to:
Posts (Atom)